Synchronize with Microsoft Outlook
Synchronize your Microsoft Outlook calendar with your Veribook calendar. See below for instructions to:
Once synchronized, appointments that you add into Microsoft Outlook will automatically prevent customers from scheduling conflicting appointments through Veribook.
Schedule a Demo
Ask a Question
Synchronize your Veribook events into Outlook
1. Select the Calendar button in the main navigation bar.

2. Select the Bookings tab.

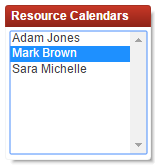
3. Select one of the existing resources. This is important as the sync is per resource. Remember to repeat these instructions for each resource if necessary.
4. Select the Setup Microsoft Outlook Sync option via the Synchronization button.

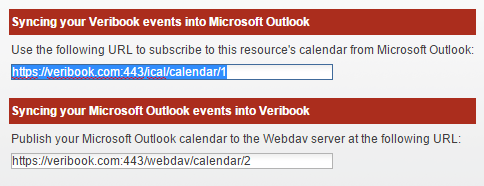
5. Copy the first URL under the heading Syncing your Veribook events into Microsoft Outlook.
6. From within Microsoft Outlook:
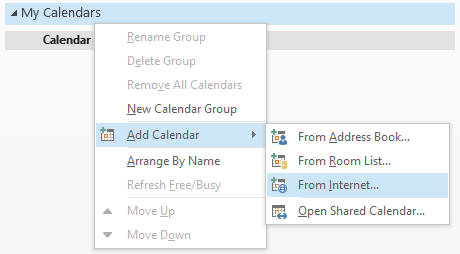
- Navigate to the Calendar Pane
- Right click on your My Calendars group
- Select the Add Calendar option
- Select the From Internet... option
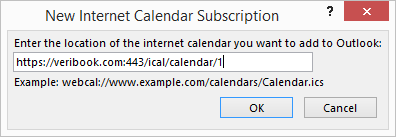
7. Paste and save the previously copied URL into the box presented.
8. Select Yes when confirmation is requested.
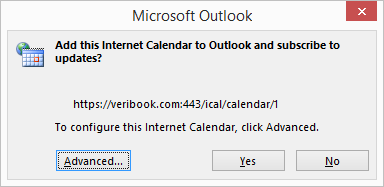
9. Enter your Veribook username (not your email address) and password
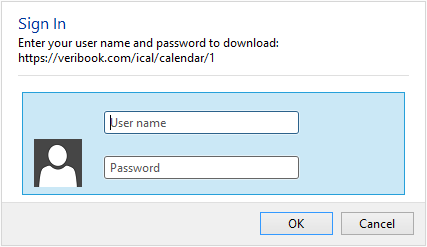
Your Veribook events will now appear in Outlook automatically as a separate calendar. By default, it will be updated at the same frequency as your email update frequency.
.Synchronize your Outlook events into Veribook
1. Select the Calendar button in the main navigation bar.

2. Select the Bookings tab.

3. Select one of the existing resources. This is important as the sync is per resource. Remember to repeat these instructions for each resource if necessary.

4. Select the Setup Microsoft Outlook Sync option via the Synchronization button.

5. Copy the second URL under the heading Syncing your Veribook events into Microsoft Outlook.
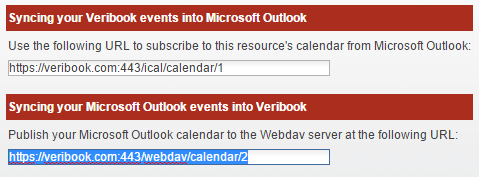
6. From within Microsoft Outlook:
- Navigate to the Calendar Pane
- Right click on the calendar that you wish to sync into Veribook
- Select the Share option
- Select the Publish to WebDAV Server... option
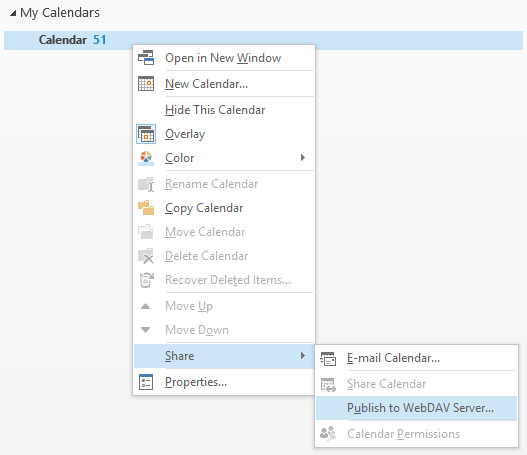
7. Paste and save the previously copied URL into the location field.
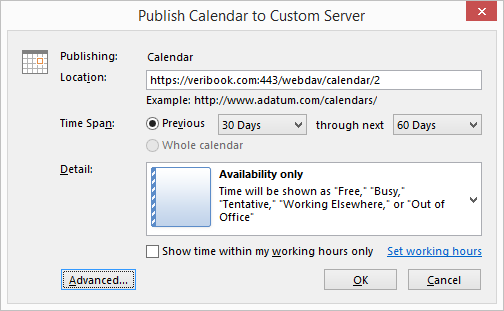
8. Enter your Veribook username (not your email address) and password

9. Select No when asked to send a sharing invitation.
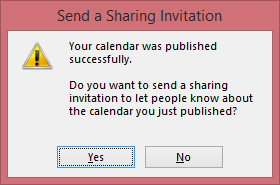
Your Outlook events will now be added into Veribook automatically. By default, this will be at the same frequency as your email update frequency.
Copyright © 2025 Amobius Group Inc. All rights reserved.