Add a Header Image to your Custom Page
Custom pages can be configured with header images of your choice. Doing so can help your custom pages share your organization's branding:
Note: this feature is currently in beta; you may encounter occasional errors when configuring custom pages.Schedule a Demo
Ask a Question
Upload a Header Image
1. Select the Setup Services button in the main navigation bar.

2. Select the Custom Pages tab.
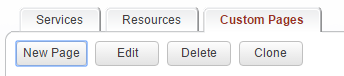
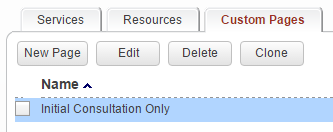
3. Select the New Page button to create a new custom page, or click on an existing custom page to edit.
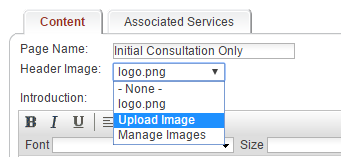
4. Choose the Upload Image option from the Header Image choices.
5. Click on the Select File button and choose an image file (e.g. JPG, BMP, PNG).
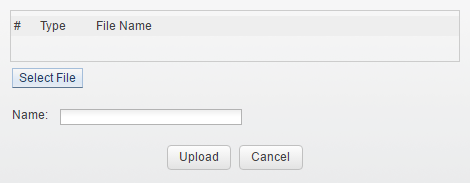
6. Replace the name for the file, if necessary.
A descriptive name will help you select the proper header image when configuring custom pages.
A descriptive name will help you select the proper header image when configuring custom pages.
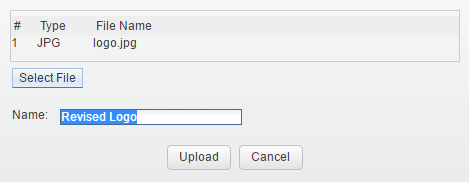
7. Click the Upload button.
Use an Uploaded Header Image
1. Select the Setup Services button in the main navigation bar.
2. Select the Custom Pages tab.
3. Select the New Page button to create a new custom page, or click on an existing custom page to edit.
4. Select one of the uploaded images from the Header Image choices.
Remember to save your selection.
Remember to save your selection.
Delete an Uploaded Header Image
1. Select the Setup Services button in the main navigation bar.
2. Select the Custom Pages tab.
3. Select the New Page button to create a new custom page, or click on an existing custom page to edit.
4. Choose the Manage Images option from the Header Image choices.
5. Choose the previously uploaded image that you would like to delete, then click the Delete button.
Copyright © 2026 Amobius Group Inc. All rights reserved.